Before I started this blog, we re-did the kitchen. It was the first major project we did after moving in two years ago. The budget-conscious goal was to spend $2000 or less on the whole thing. We didn’t quite achieve that, but we got close. And we’ve been really happy with the results.
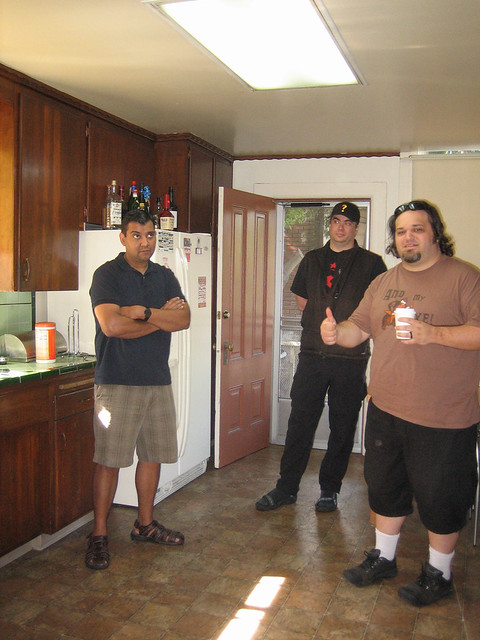
This picture was taken when we visited the house before escrow closed. L-R: John-Michael (our friend and realtor), Mike, looking askance, and Randall looking psyched! In this shot you can see the old back door, the low ceiling with florescent fixture, and the scalloped wood trim that went all the way around the ceiling.
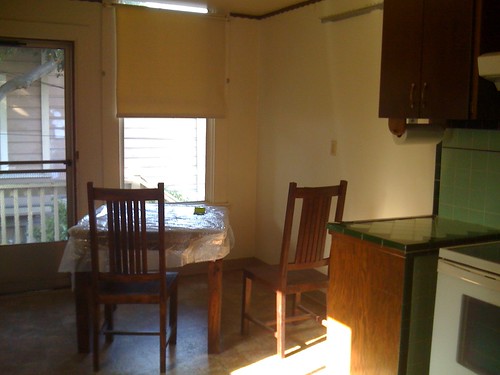
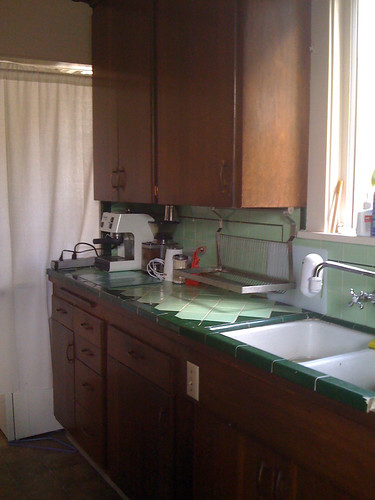
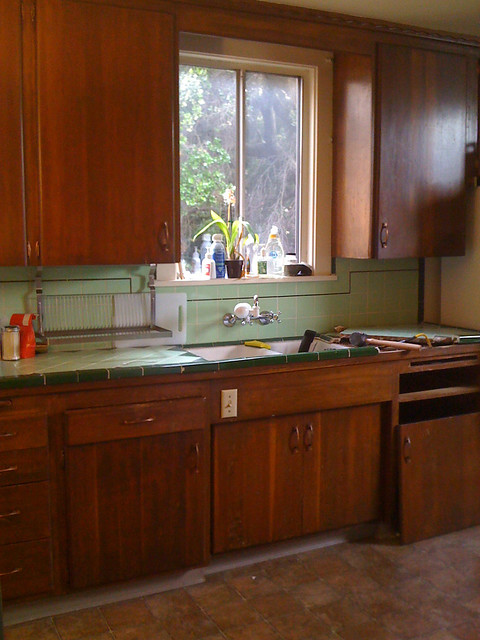
The cabinets were grimy wood – some solid, some plywood (and signed by the builder in 1957). Perfectly serviceable still, but they made for a dark, small-looking room. The tile counter (same era) was driving me nuts. Don’t get me wrong, the green-on-green retro tile was cute, but it was chipped, cracked, and the grout had failed long ago.
The sink was in a similar state – it never looked clean and the seal around it was shot. We had already started demolition in this photo and were investigating fitting a dishwasher where the cabinet on the right is. Demolition is is pretty fun. If you get the chance to tear up part of your house before you build it back up, do it!
I started with something I knew I could handle: painting the cabinets. I took off all the cabinet fronts and drawers and borrowed a sander from friends (Thanks Romi and Damon!). With a helpful tutorial from Young House Love and a lot of tarps and sawhorses in the basement I went at it. I’ll be honest, it wasn’t an easy project. The wood had lots of grease buildup and dents, so sanding was slow going. I patched a lot of dings and cracks and sanded again before I wiped it all down and painted it with a roller. But painting even two or three coats seemed super fast after the sanding/degreasing phase.
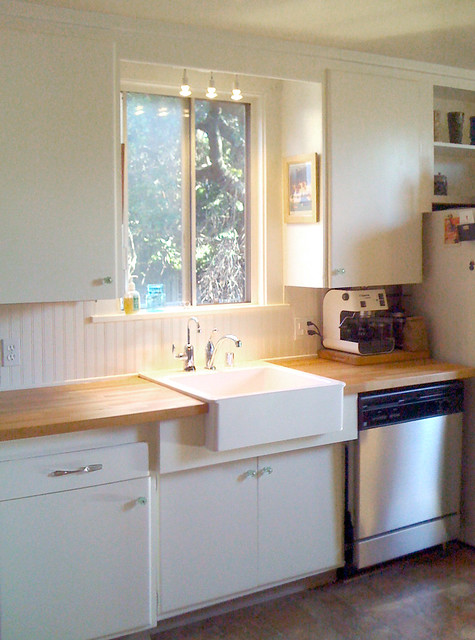
The very reasonably priced sink, counters and dishwasher are all from Ikea. Wood counters are cheap and lovely, but they do require regular maintenance. We seal them with spoon oil every couple of months, and if that doesn’t protect them enough, catastrophic stains can always be sanded out. Just have to make sure not to let liquids sit on them too long.
We had professionals for this whole part of the project. Joel at Baron Solar put in a new circuit for the dishwasher and garbage disposal and put in backsplash outlets that modern code requires. A handyman rebuilt part of the under-cabinets (Lots of old water damage. This is what took us over-budget. Curse you old tile counter!) and built out support for the deep farmhouse sink. They also cut out the cabinet to the right of the sink and built a frame to hold the counter and dishwasher. Since our handyman was a licensed contractor he also handled the plumbing: adding the line and airgap for the dishwasher as well as moving the faucet lines from the wall down to the sink.
Since the photo above was taken we’ve gotten a new faucet that’s taller and better for the space, provides stronger water flow and a pulldown spigot which it turns out you really need with a flat-bottomed sink. It was almost as cheap as the old one because the chrome version was on sale. No oiled bronze for us!
After the counter and sink were in we put up the beadboard backsplash. Again, inexpensive and pretty simple. Measured the area, cut the beadboard pieces with a chopsaw and jigsaw and painted them thoroughly with washable paint. We nailed them to the wall, covered the bottom edge with trim and sealed all the seams with silicone caulk.
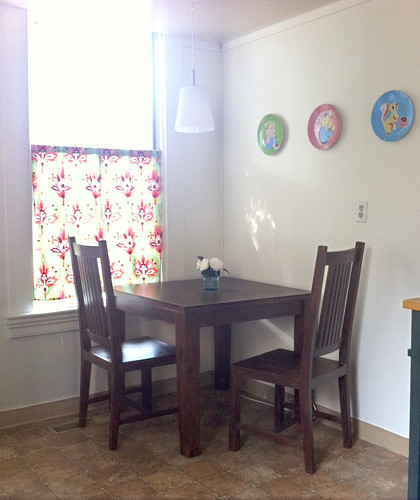
I know people are getting tired of white kitchens, but I don’t care. You can’t beat it for clean and bright and the great thing about white is adding COLOR. We got a simple pendant light from Ikea (the supercheap halogen fixture above the sink is also Ikea) and I took down the roll-shade and made a cafe curtain from Amy Butler fabric. Randall got me the plates a few christmases ago.
Get off the table, Mooncookie!
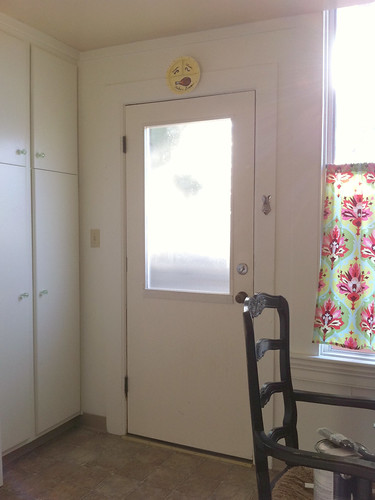
I was maybe a little obsessed with brightening up the room so we got a salvaged door with a window. As with most things, this project was more complicated than we expected. Turns out that 120 year-old houses don’t have straight door frames! Who would have thought. So we chiseled it down til it fit.
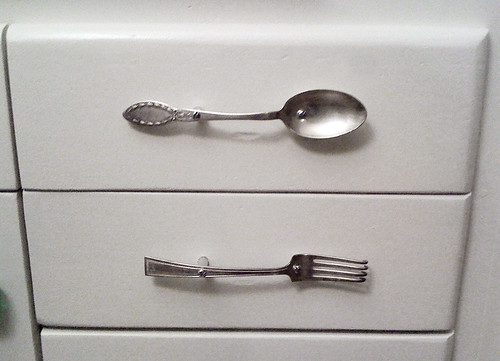
Before we started our friend Heather proposed making drawer pulls out of old silverware. Excellent idea and I wish I could claim it was my own. It was a little tricky to start the drill holes in the utensils and find the right hardware to space them away from the drawer, but we got it worked out. For knobs I used the cheapest bottle green depression glass knobs (repro) I could find on ebay for around $2 each.
Yes, I’d love to get rid of the ugly vinyl floor and raise the ceiling, but I think we did pretty great for $2000(ish). It was the best we could do at the time and I’m so glad we did it. The space seems much bigger, everything is easier to keep clean, and it’s a nice place to work and hang out.
If you’re planning your own kitchen makeover, allow me to give a little advice: You’ll probably go over budget and over schedule, so just keep that in the back of your mind and be ready for it. Where there is plumbing there is frequently water damage, and it’s usually lurking in places you can’t see. Clear a space to prepare food while construction is going on, and make sure your tub and bathroom sink are hygienic enough to handle a few dishes. Work with materials you’ve got, but don’t cheap out on the important stuff. Above all, look at the character of your house and work with it! You don’t need a Tuscan McMansion HGTV Special to add happiness and value to your space.
***
Each year Apartment Therapy has a competition for the best home blogs and Revictorian’s been nominated in the DIY category! If you’ve read this far please consider throwing a vote our way. We may not win, but each and every vote provides valuable exposure for the work we do on this blog. Vote by March 2! Scroll down on the page and you can log in with your Facebook account. Then find Revictorian in the list. Thank you, and tell your friends!

