A quick note about Pinterest

pinterest-logo

I have two Pinterest accounts: One for myself and one for Revictorian. But the truth is I hate logging out of one to maintain the other, so I’m consolidating both into my personal one. I’m still maintaining boards on Victorian exteriors and interiors, and a couple other areas of relevance. If you poke around you may find out more about me than you’d ever hoped, but I’m mostly harmless. And if you happen to be into in poster design, tattoos or antique jewelry, you might find something else you’re interested in.

You can dress her up…

overdoor

With the kitchen creeping towards completion (but not finished yet), my mind has moved to the exterior of the house. We did a bunch of work on the outside to take it from horrid to okay, but it’s still plain. I spoke to a neighbor who remembered meeting a visitor who grew up here and them commenting how they remembered gingerbread on it. Gingerbread can mean many things to many people, and I’m not kidding myself that the direction we’re going with the outside is historically accurate. But we’re taking some cues from the moldings that remain and I have plans to bring back some of the old style.

I’m starting with the area you see above. I call it a transom, even though I don’t know that there was actually ever a transom window there. My plan is to make a scroll-cut panel that will lay in the gray rectangle. Pictured below is the only remaining corbel on our house, and aside from window casings, it’s all we’ve got to go on.

2013-07-02 09.43.51

I think our house probably qualifies as a Folk Victorian: a simple, mostly symmetrical residence that used some of the ornament that was starting to become available, but wasn’t built as a showcase for it like a Queen Anne. I poked around our neighborhood and though I’ve never found a duplicate of our house, I looked at some of the millwork on the older houses and got some ideas about what the ornament may have looked like, and what the tools of the time could produce (Our house is either 1890 or 1896, and it was one of the first in the area).

2013-07-02 09.40.29

2013-07-02 09.37.49

These appeared to be the oldest houses around that were still intact. Lacy, scallopy trim with an occasional scrolly corbel or bracket. Clapboard siding, not shingles.

2013-07-02 09.33.41

2013-07-02 09.32.58

These look more like the San Francisco vics I grew up with. A little more ornate, level upon level of woodwork (the gold balls atop the stars), and scalloped shingles mixing with the clapboard.

This however, is in many ways the most like our house:

2013-07-02 09.38.27

Even down to the god-forsaken awning. Simple casings, symmetrical roof, plain clapboard. Fancy on the roofline though. Like I said, I’m not looking to make a historical reproduction. I just want the house to fit in with the other houses of the era, working with our budget and our aesthetics.

I have no skills with a scroll saw or a jigsaw or a lathe, but I do know my way around computer-aided design and we in the Bay Area are super lucky to have a place called TechShop. You pay for membership, take some safety classes, and then get access to extremely modern tools like laser cutters and 3D printers. Remember the house numbers? Those were laser cut via mail order, but soon I’ll be able to operate a cutter myself. I get gleeful with the possibilities!

So anyway, that transom panel. Taking inspiration from what we’ve seen, I mocked these three designs up:

trans-designs

I like aspects of each of them, but none were exactly what we wanted. I talked to Randall about which aspects we liked and came up with this:

trans

It’s not final. I can never stop messing with designs til the last minute. But it’s simpler, and I think it should be. But I’m sure I’ll also cut a flower center like the one at the top, just in case we don’t like the disk/orb. Disclaimer: It may be a little while til I actually get to cutting – our part-time son Max is here for the summer, and well, I have priorities.

What do you think about the design? How would you dress up a simple house?

More adventures in lighting

I had many different ideas about a light fixture for the kitchen as you might gather from this pinterest board. If money were no object we probably would have gotten something fancy from Rejuvenation or somewhere, or even have gone decidedly more space age:

508b294a2f2609b85b978fa6c333e531

But a combination of budget and my masochistic DIY impulse lead us to something else. I have mixed feelings about what I’m about to say, but it’s the truth. We copied someone else’s design. And not a big corporation’s design, a small shop’s design. I didn’t do it for profit and it’s not exactly the same, but I admit that I don’t feel totally good about it.

We saw a simple but unaffordable chandelier in a local store and I could tell that it was something we could make if we could find the parts. So we did. A little internet research yielded a couple of excellent lamp part suppliers: Grand Brass and Antique Lamp Supply. Between the two of them and several orders (having never built a fixture from scratch we missed a few parts the first time) they had everything we needed. All told it came to a little less than half the cost of the fixture it was modeled on (about $200 vs. $500+).

brassparts

Even though all the parts are brass we planned on doing a blackened finish so as not to conflict with our crazy silver ceiling. They make blackening solutions for brass, but the parts didn’t all start with the same finish texture and blackening solutions are finicky at best. So I scrubbed them all and bought high-temp outdoor flat spray paint, made for barbeques. I was hoping it would be durable like appliance paint but no such luck. That’s okay though, it’s not like people are going to be touching it.

brass2

Once painted, assembly was simply a matter of screwing the parts together and wiring the sockets. It got a few scuffs after assembly so I gave the whole thing another coat of paint. In the meantime our friend and electrician Joel came over and moved some switches and put a new box in the ceiling for the chandelier. He had a giant drill bit that took a core sample out of the ceiling the exact size of the mounting box that he managed to get dead center. That was a great relief because I had been picturing myself on a ladder trying to cut a perfect circle in the metal ceiling  using a sawzall. And while he was there he installed the light too. So here it is.

chand-new

Simple 4-arm uplight chandelier with sandblasted square shades. Unassuming but bright. No fuss to compete with the ceiling. And of course it features the sigil of our house: Unicorn horn!

unibody

The kitchen ceiling is DONE

Working on the kitchen has been an exercise in fits and starts. One task would begin, then be delayed, then another part of the project would rear its ugly head. Rinse, repeat. So it’s been hard to figure out a good point at which to write an update here. But here goes.

Application of the ceiling tiles continued as before (I followed this guide). I managed to kill one brad gun and a case of Liquid Nails before I was done. It wasn’t a complicated task, just a laborious one, especially since installing from the center outwards is non-intuitive and the tiles needed to be overlapped in a single direction across the whole ceiling. I used a big guillotine paper cutter to fit the tiles to the edges and the attic door. Did I mention that instead of clear-coating the first 3 tiles I accidentally used white paint instead? Yeah, it took me 2.5 tiles to figure that out. Because of that, I used every last good tile and Randall had to scrub paint off a couple of the ones I messed up.

After about a month of working on it for an hour here or there (and a surprise week in NYC), it was finally all covered.

ceilingtiles

But just as important was the finishing. Crown molding to hide the junction of wall and ceiling and also a molding around the top of the cabinets to give them less of a mid-century look. I started with the cabinets since it would be small, flat pieces of molding that I could handle alone. Measure, cut, paint, nail.

The crown was another story however. A weird, complicated 2-person job. I was heartened by this post, but it seems that a rotten first try is required in the crown molding game. After much second-guessing, heated discussion, and exhaustion, we got it installed. But it’s not our finest work… the lumpy walls and ceiling saw to that. Ooh, that gap!

molding-gap

It IS gappy, no question. But we did the best we could (first timers!) and hopefully the razzle-dazzle factor will make these problems disappear for less critical eyes.

Here’s a little before and after of both the cabinet and crown molding:

molding-compare

It’s looking pretty smart! Though now that I see it all together the room looks more buttoned-up and proper than I expected. I’m sure we’ll fix that.

Next: The light fixture.

Ceiling: The Journey Begins

aaron

Aaron made it over and plyboarded the whole ceiling. I’m glad he did because I’m quite certain we couldn’t have done it ourselves in three times the amount of time.

Oh look, he’s already done! And there you can see the pull-down door to the attic.

ply

We all took a moment to celebrate our shared victory.

a-r

Since my last post I finished resurfacing the walls and repainted them using the light cloud color I showed before (it’s Benjamin Moore “Healing Aloe”). It looks pretty good. The color is annoyingly baby blue sometimes, but I like that it changes to gray and greenish depending on the light. I also clear-coated the ceiling tiles ten at a time in the garage. Fume-tastic.

When Randall and I got some time to work together we set about measuring the ceiling and finding the center point. We marked it by making a cross with chalked string. You snap the string against the ceiling and it leaves a blue chalk line all the way across. It also left a puddle of loose chalk on the floor that Mooncookie thought it would be fun to roll around in.

bluecookie

She looks embarrassed. She should be. She was shoving her face into it like it was catnip. Randall gave her a bath while I went on with the ceiling (I got the easier job). I was jealous of everyone else getting face time in this post so check out this weird picture of me posing with a caulking gun!

va

Gluing the first tile at the center point, I worked outwards as I went, checking to make sure the grid remained square. That’s not too hard but the tiles also need to overlap so that the raw edges face away from the entrance of the room. They definitely look cleaner in that direction, but it’s hard to apply them that way when working from the middle. Also it was pretty clear that we’d need reinforcement nails and the amount of glue we purchased wouldn’t be sufficient either. Back to the store we went for a full case of glue and an electric brad nailer.

Glue, position, nail seams. This is as far as we got:

tintiles

But check out that wall color! Look at those flashy tiles! They’re a little ostentatious but I think it’s going to turn out pretty as heck.

Still working on the walls

mooncookie-ladder

Well, skim coating the walls only made the bubbles beneath the wallpapers more obvious. So I sanded and applied more mud. Rinse, repeat. Also patched a few holes we put in when we were crowbarring the ceiling and spackled ONE THOUSAND nail holes. It took a couple weeks of working here and there, but the walls are smoothish. They’ve got “character” for sure, but I think they look pretty nice. I’m not bad with a trowel and I think I might actually be able to install drywall if I needed to.

They’re ready for primer and paint. Now that we have SO MUCH wall space and the room seems big, I was thinking about painting the walls a soft light gray instead of white. Just to add some dimension. A desaturated sage or dove kind of color. I liked these so I gave them a shot:

paint

Naturally they don’t really look the same on the wall. The one on the top is too dark, but I like the one on the bottom. It looks like cloud vapor.

painted

My only concern is the room looking too cold with the silver ceiling and white cabinets. But the counters are still wood, and I’d like to put in wood flooring too, so maybe it balances out. Maybe? What do you think?

Meanwhile. The plan for the kitchen ceiling is to cover the whole holey thing with plywood and nail up the (unpainted) tin ceiling tiles. Tin tiles were apparently created in America to mimic the look of fancy European plaster but they really took off in the late 1800s when lath and plaster ceilings began to decay in earnest. Makes perfect sense to me. Aaron is going to install the plywood for us, but he has a day job so it’ll get done when he can fit it in.

But what about the walls?

Before we even start on the ceiling, there’s a lot to be done. Like the walls. I didn’t really think about the walls. On one side there’s painted chipboard paneling, 1960s style. Not entirely sure what’s underneath it, but I hope it’s not smashed up plaster. On the other side, we have three layers of wallpaper and at least two layers of paint, some of which only go partway up the wall.

wallpaper side

This picture is actually after I pulled the former crown molding off and took with it an entire layer of paper. Thank goodness for that mesh-backed paper from the 70s. This is what that paper looked like, btw (the paint just peeled right off of it):

paper1

Underneath that was this (covered in browning glue):

paper2

Under that, going all the way up to the old ceiling is this charming print:

paper3

Which has a brown colorway twin in our basement. I thought that would be all, but that paper was peeling a bit above the window and below it and another layer of paint, I found this:

paper4

Looks like a moorish mosaic pattern. In blues! Since I was descending well into lead paint territory, I opted to stop there.

As I mentioned, the wall by the laundry and bathroom was covered in paneling that Randall made quick work of removing. Underneath was drywall covered in a textured goldenrod paint, and the wall is in pretty decent condition. I was worried that they chose paneling to cover some massive holes, but I think they just liked the style. If I’m not mistaken, the paneling was originally Pepto Bismol pink. The newly naked wall has a spot full of tack-holes where a calendar used to be, and the silhouette of an awesome deco switch plate, but not the plate itself.

switch plate

I’ve got a lot of spackling and smoothing to do. The internet tells me that a skim coat of joint compound will probably work for this, but it’ll be my first time working with the stuff. First I need to sand away some of the lumps of wallpaper paste, but I’m not going near that goldenrod wall with the sander. I’m sure everyone’s favorite lead paint is waiting.

resp

Safety first! If  the skim coat doesn’t go well we can always put drywall over it. In the meantime, lots of dust to clean up.

Into the not-so-great unknown. Our attic.

With the drop-ceiling gone, we can finally get into the attic. Our handyfriend Aaron came over to install a drop-down attic ladder in the kitchen ceiling. Since the ladder is made to be mounted to the joists in the attic, the stability of the ceiling itself isn’t important, and that’s good because several spots look like this:

ceiling holes, explained.

There is no way we could have installed the ladder ourselves, if for no other reason than I lack the upper body strength, so having an Aaron is great. I recommend it. He taped off an area around where he was working, essentially making a small plastic room within the larger kitchen. It didn’t stop the RAIN OF FILTH that came down from somehow getting all around the house (thanks a lot, you dirty cats!), but that’s okay because now we can get in the attic.

We took a short look around. We could see disconnected gas pipes that I believe once lit the house, new wiring and knob-and-tube wiring, something terrifying in the corner (I’ll get back to that), and a thick layer of dirt on every horizontal surface. Have I mentioned the attic is filthy? 100 years of roof dirt waiting just for us! It was serious, so I got out our Dharma Initiative jumpsuits from a few halloweens ago.

dharma

That’s my serious face. We climbed the ladder with masks, a shop vac, a lantern and a trash bag and got to work. Taking care to only stand on the floor joists, we picked up large debris by hand and vacuumed the dirt. The debris was lath, plaster, old lumber, a petrified lemon, and a marble! That’s all we found in the cubic yard we were able to clear. Who knows what awaits us in the next 1000 square feet! That area alone took over an hour, and boy was it hot up there. Turns out that’s where all the heat goes! It’s California, nothing’s insulated here.

So the thing. In the corner. It looks like a big (beach ball-sized) lump of spray foam insulation stuck to an outside wall, but it’s not insulation. Nope, it’s organic. You can only really stand up in the center of the attic where the peak of the roof is, so to get over to the lump you have to crawl low along a joist. I creeped over to get a look and got to about five feet from it and turned back when I could confirm that it was not, in fact, man-made. I tried to get a photo of the thing but failed. Then I called Randall in and he smote the giant, papery abandoned wasp nest with a broom. It was abandoned! Hooray!

nest

My hero! His backside. Forgive the photo quality, it was very dark.

After that we both decided we’d had enough and closed up the attic until we had a reason to be there. My apologies to our future electricians.

Next… back to the kitchen.


G’bye kitchen ceiling!

This is what the kitchen ceiling used to look like. This was the day we decided to buy the house.

ceiling-before

Since we don’t yet have the $ to replace our pipes, we opted to delay the bathroom remodel and instead we put our energies into demolishing the kitchen ceiling. Demolishing is (nearly) free! Yes, we’re tearing apart a perfectly good ceiling, but we have our reasons (Pro tip: It’s really ugly).

First thing we did was buy a reciprocating saw, a Ryobi that had a compatible battery pack with our drill. It didn’t work so well. It turns out that brute-force tools really need to be the plug-in variety. So we took it back and got a plug-in DeWalt (More expensive. Worth it.).

The ceiling is drywall attached to a very robust grid of beams. We started by sawing into the beams surrounding the useless attic access hole. Once the first section of beam was gone, we could start tearing away the drywall in chunks, moving across the room. randall with beams

There’s Randall working around the inset fixture. Look at all those beams! Solid wood. It’s a big room and removing the drywall took all day. We left the room taped off and the next day we took out the beams with a combination of sawing wood and crowbarring the many long nails. After confirming the electricity was off, we let the light fixture fall to the ground. It took a little more than a day for the beams, but we ended up with this (click for larger):

Look at that paint line. The old wallpaper. That poor window! And in the rubble we found this:

65

Construction dude of 1965: While you may have created an architectural abomination, you were still a worthy craftsman and I salute you.

The ceiling.

Up next: The attic.

That Dang Light

Hi Y’all! Long time. Guess what? I finally finished the bedroom light!

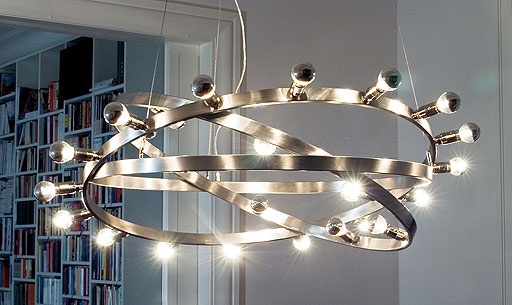
I had some setbacks, but it’s done, and I’m really happy with it. Remember back in March when I started all this? I spotted a type of light fixture on ebay I hadn’t seen before, but I wasn’t willing to spend what it sold for. So I hatched a plan and bought this chandelier to modify instead. As you can see it had hanging sockets, but not for long.

It arrived from the ebay seller as described: broken, discolored and as-is.


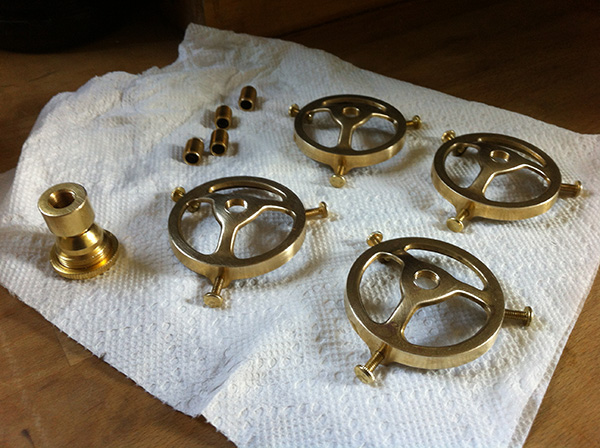
I began by taking everything apart that would come apart, and cutting away the old cloth-wrapped wiring. I got rid of the hanging sockets not intending to replace them.

Then I gave it a bath! It was… gross. I knew it had been repainted at least once so it couldn’t be a whole century’s worth of dirt, but it seemed like it.

I readied my supplies: plain old acrylic paint (metallics). I don’t know that this paint will last a hundred years, but I think it’ll survive on something that doesn’t get handled often.

I mixed a color I liked, a nice rosy gold and painted all visible parts with a brush. I didn’t want it to look like a flat spraypaint job, so when the gold was dry I went over it with a watered-down wash of black paint, wiping it away with a rag anywhere it was too obvious. This toned down the gold and gave it some patina and dimension.

This is how it looked:

It was okay, but in the months since I started this project, I had bought some gold leaf enamel that had worked well on the house numbers, so I decided to accent with it. It helped make it look more like metal and less like paint.

I also bought scraps of mica from another ebay seller who makes lampshades and proceeded to cut out the shade inserts. I bought silver mica, not the usual amber color. Turns out working with mica is pretty easy, at least for simple curves. It cuts with scissors and all you need to shape it is a heat gun, some tongs and patience.

To secure the mica panels in place I used a rubber compound called Sugru that Randall had given me. It sticks to what it’s molded to and cures in 24 hours. That’s what the black lumps are. It’s not the best looking adhesive but it was perfect for this.

Here’s how it looked all painted with the mica in place. It certainly is gold. Now I just needed to wire in some sockets.

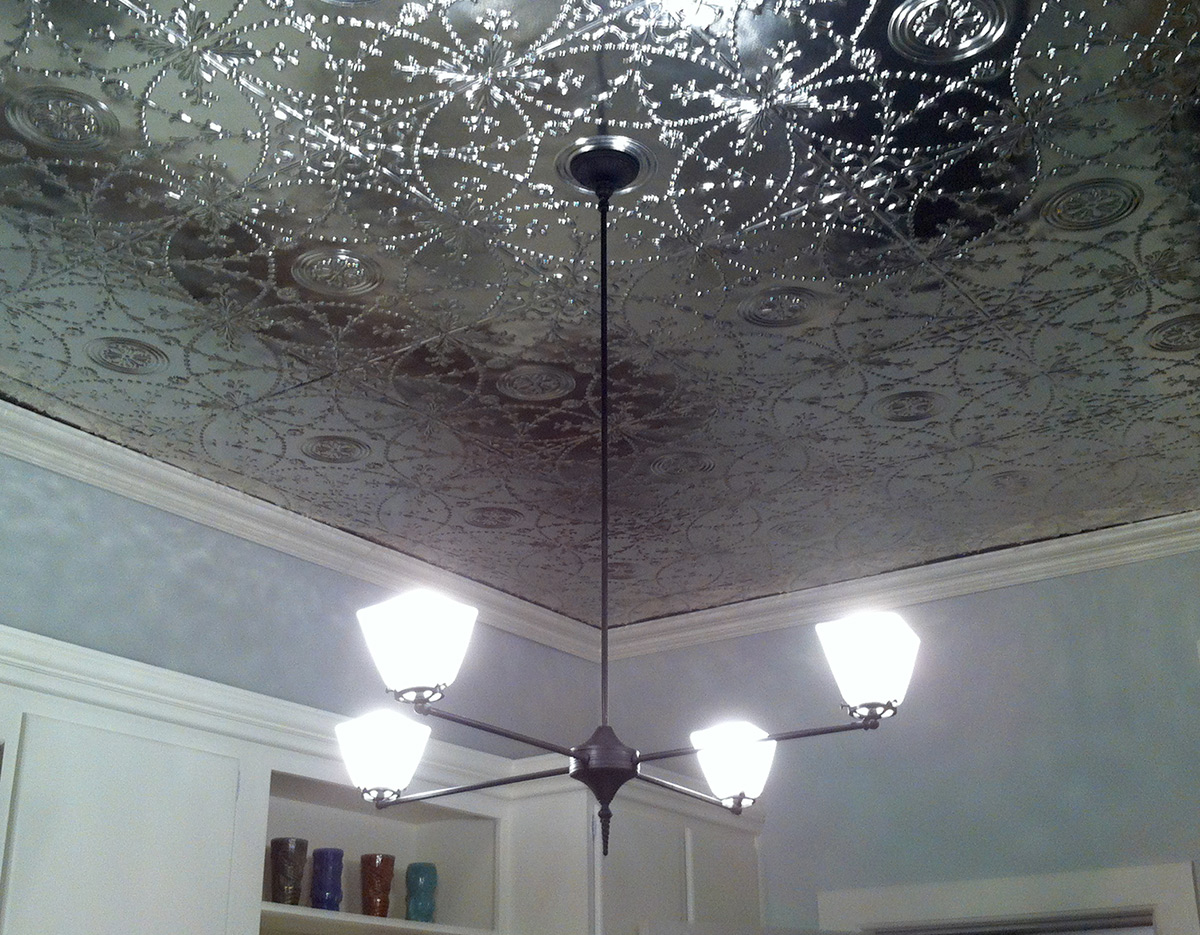
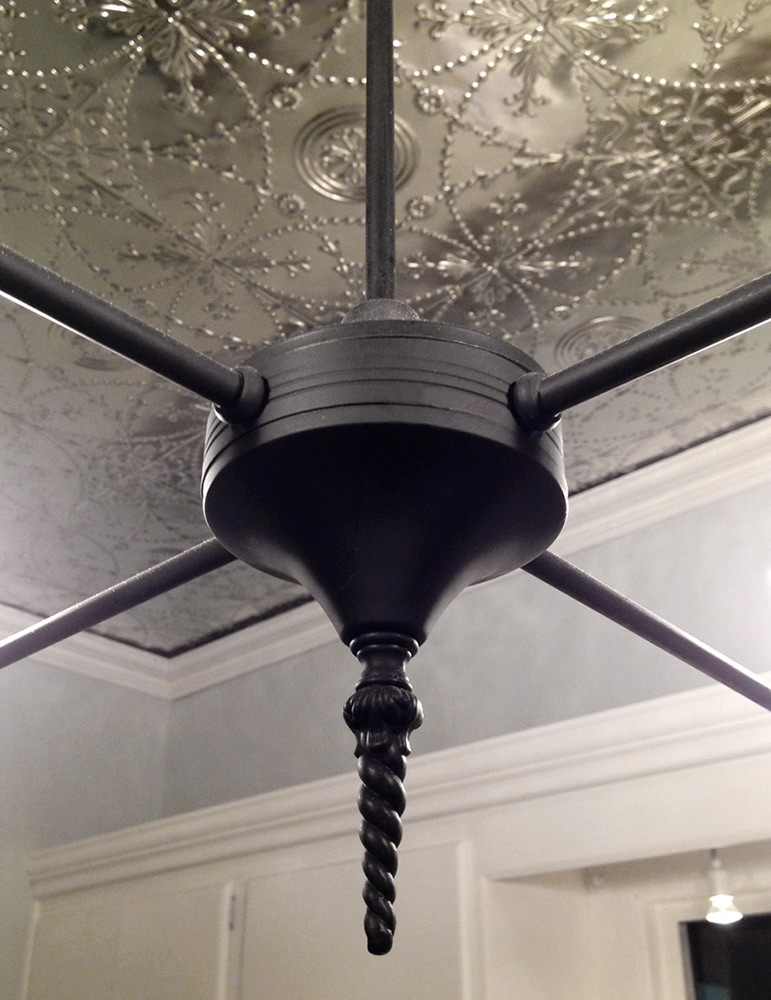
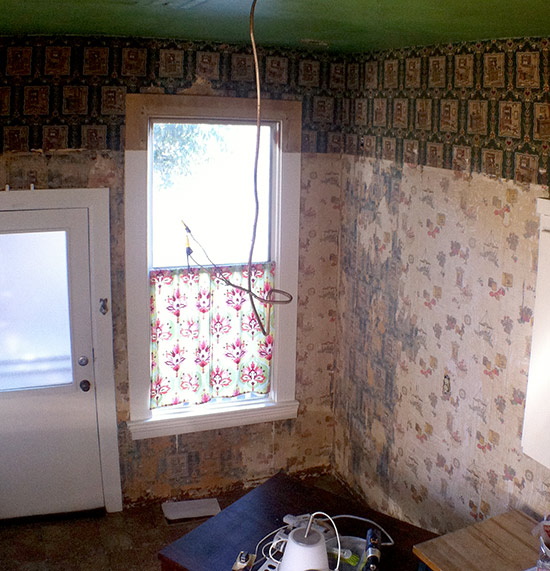
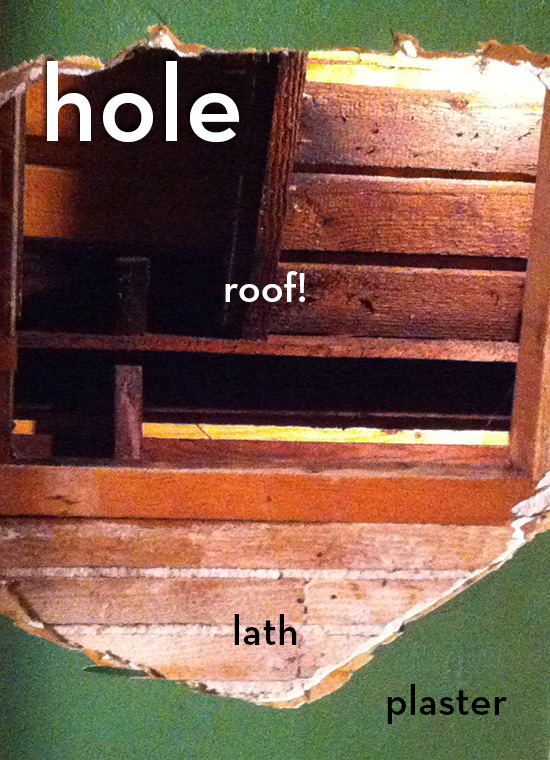
MEANWHILE, we moved our giant bed and went up the ladder to see how the current light was rigged up. Bad news – it was affixed not only by screws but with paint and plaster. We would literally need to chisel it out, and we wouldn’t know how to rig the new canopy until we saw what was in the ceiling, with the power turned off all the while. So we moved the bed back and delayed. For months. Until finally one day I realized that our local hardware store sells all kinds of obscure chandelier parts, and I got my confidence back. Randall got the old light down with a chisel and hammer, and we went right back to the store to get the couplings and bolts we needed to hang it. We bought the canopy there too. It’s not a great style match, but it’ll do.

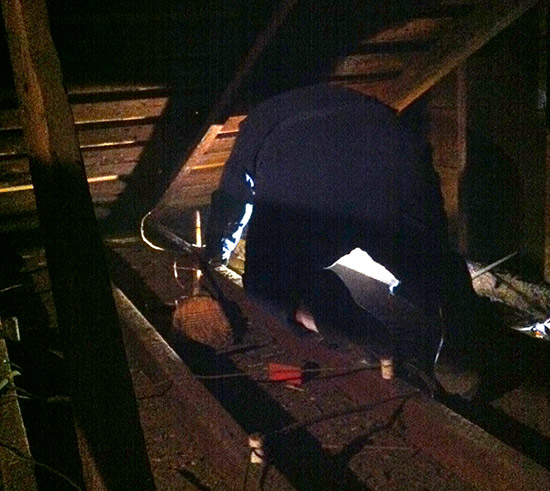
Finally, after heroically wrestling with bolts and wires for most of the afternoon, Randall succeeded in getting it operational.

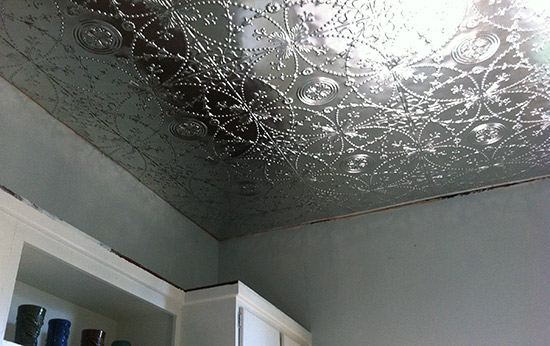
When I got the silver mica I was a little disappointed that it just looked like parchment when held up to the light, but with a bulb it looks lovely and crystalline. It’s a nice soft light for the room with a great silhouette design. I’m really happy with it and stare at it a lot.