The spot above the door

Remember this spot?

blank

I finally got around to laser cutting the panels for above the front doorway. There’s something about the front of this house that just never looked like the front and I wanted to fix that. Click here to see the progression til now.

after4

The panel didn’t come out exactly like I pictured it, but I like it. I mean, I’ve definitely seen weirder and more awkward original millwork on California victorians, and it adds some much-needed flair. I may still add an applique to the center to give it more dimension.

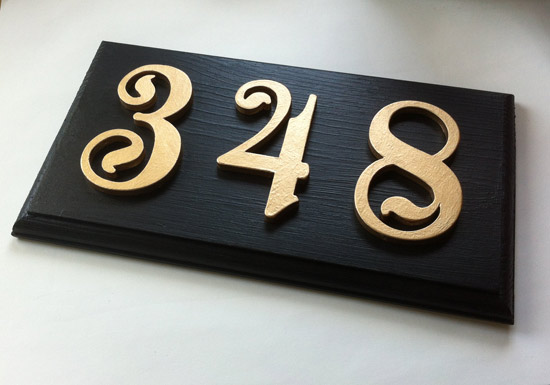
There were limited material options available for laser cutting, none of them really ideal. I chose plywood despite it being less than ideal. But I had already made the house numbers from MDF (reputed to turn to oatmeal in the rain) and they seem to be doing fine with only moderate protection.

painting

I got some serious oil-based primer and gave it three sloppy coats, plus house paint. It should last a few years anyway. Here’s another before and after:

blank2

side-after

after1

But now it REALLY needs a gable or something nice for that vent.


More adventures in lighting

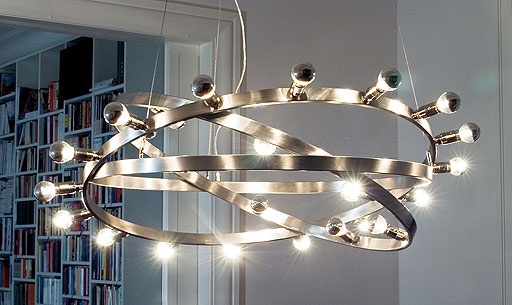
I had many different ideas about a light fixture for the kitchen as you might gather from this pinterest board. If money were no object we probably would have gotten something fancy from Rejuvenation or somewhere, or even have gone decidedly more space age:

508b294a2f2609b85b978fa6c333e531

But a combination of budget and my masochistic DIY impulse lead us to something else. I have mixed feelings about what I’m about to say, but it’s the truth. We copied someone else’s design. And not a big corporation’s design, a small shop’s design. I didn’t do it for profit and it’s not exactly the same, but I admit that I don’t feel totally good about it.

We saw a simple but unaffordable chandelier in a local store and I could tell that it was something we could make if we could find the parts. So we did. A little internet research yielded a couple of excellent lamp part suppliers: Grand Brass and Antique Lamp Supply. Between the two of them and several orders (having never built a fixture from scratch we missed a few parts the first time) they had everything we needed. All told it came to a little less than half the cost of the fixture it was modeled on (about $200 vs. $500+).

brassparts

Even though all the parts are brass we planned on doing a blackened finish so as not to conflict with our crazy silver ceiling. They make blackening solutions for brass, but the parts didn’t all start with the same finish texture and blackening solutions are finicky at best. So I scrubbed them all and bought high-temp outdoor flat spray paint, made for barbeques. I was hoping it would be durable like appliance paint but no such luck. That’s okay though, it’s not like people are going to be touching it.

brass2

Once painted, assembly was simply a matter of screwing the parts together and wiring the sockets. It got a few scuffs after assembly so I gave the whole thing another coat of paint. In the meantime our friend and electrician Joel came over and moved some switches and put a new box in the ceiling for the chandelier. He had a giant drill bit that took a core sample out of the ceiling the exact size of the mounting box that he managed to get dead center. That was a great relief because I had been picturing myself on a ladder trying to cut a perfect circle in the metal ceiling  using a sawzall. And while he was there he installed the light too. So here it is.

chand-new

Simple 4-arm uplight chandelier with sandblasted square shades. Unassuming but bright. No fuss to compete with the ceiling. And of course it features the sigil of our house: Unicorn horn!

unibody

Ceiling: The Journey Begins

aaron

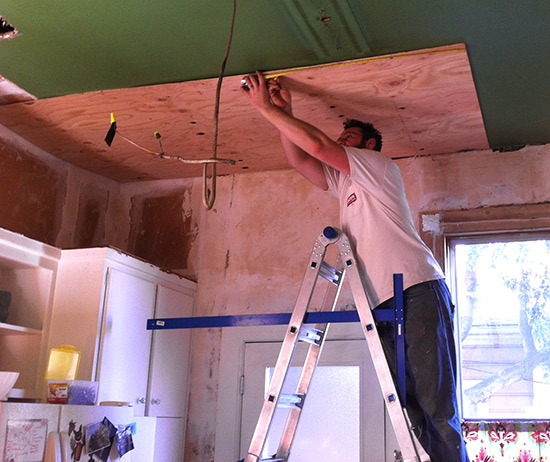
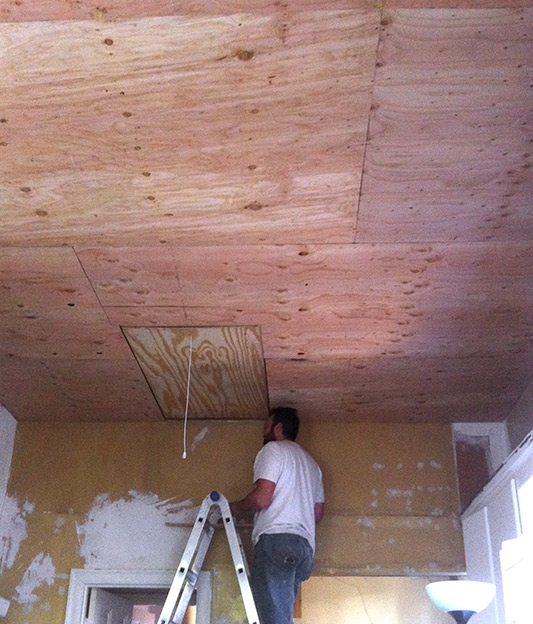
Aaron made it over and plyboarded the whole ceiling. I’m glad he did because I’m quite certain we couldn’t have done it ourselves in three times the amount of time.

Oh look, he’s already done! And there you can see the pull-down door to the attic.

ply

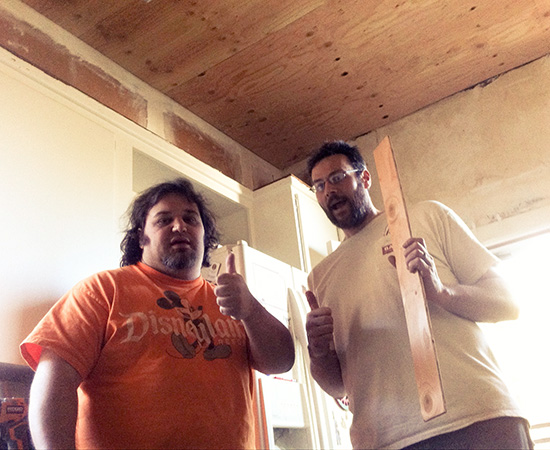
We all took a moment to celebrate our shared victory.

a-r

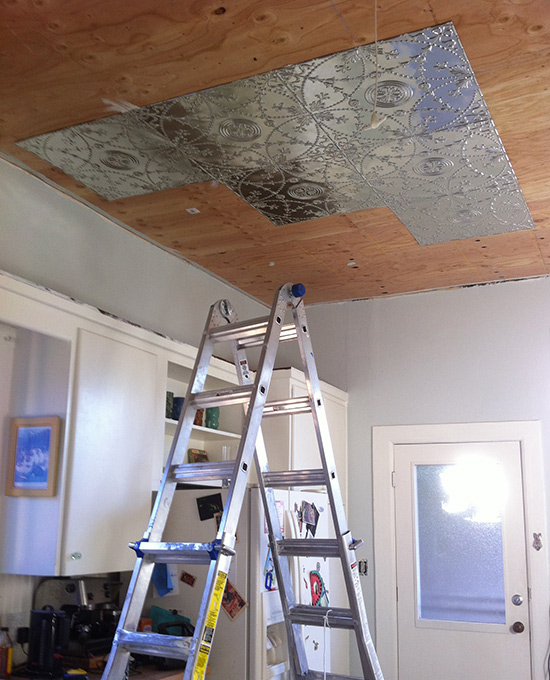
Since my last post I finished resurfacing the walls and repainted them using the light cloud color I showed before (it’s Benjamin Moore “Healing Aloe”). It looks pretty good. The color is annoyingly baby blue sometimes, but I like that it changes to gray and greenish depending on the light. I also clear-coated the ceiling tiles ten at a time in the garage. Fume-tastic.

When Randall and I got some time to work together we set about measuring the ceiling and finding the center point. We marked it by making a cross with chalked string. You snap the string against the ceiling and it leaves a blue chalk line all the way across. It also left a puddle of loose chalk on the floor that Mooncookie thought it would be fun to roll around in.

bluecookie

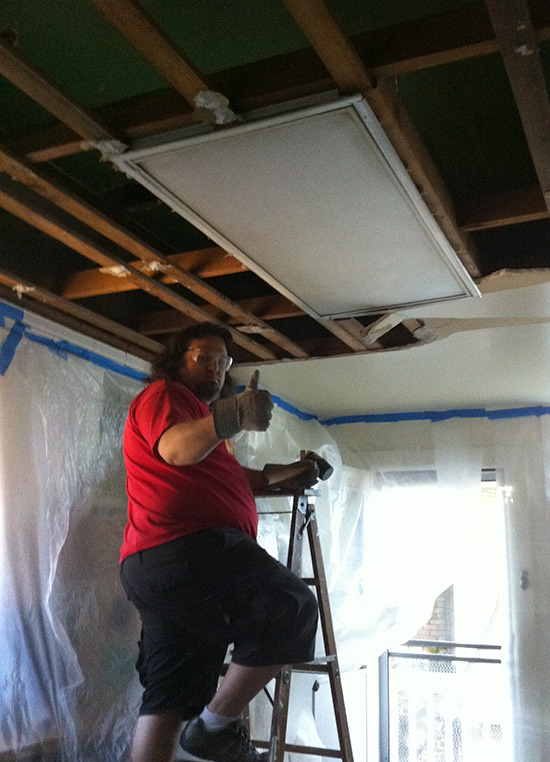
She looks embarrassed. She should be. She was shoving her face into it like it was catnip. Randall gave her a bath while I went on with the ceiling (I got the easier job). I was jealous of everyone else getting face time in this post so check out this weird picture of me posing with a caulking gun!

va

Gluing the first tile at the center point, I worked outwards as I went, checking to make sure the grid remained square. That’s not too hard but the tiles also need to overlap so that the raw edges face away from the entrance of the room. They definitely look cleaner in that direction, but it’s hard to apply them that way when working from the middle. Also it was pretty clear that we’d need reinforcement nails and the amount of glue we purchased wouldn’t be sufficient either. Back to the store we went for a full case of glue and an electric brad nailer.

Glue, position, nail seams. This is as far as we got:

tintiles

But check out that wall color! Look at those flashy tiles! They’re a little ostentatious but I think it’s going to turn out pretty as heck.

G’bye kitchen ceiling!

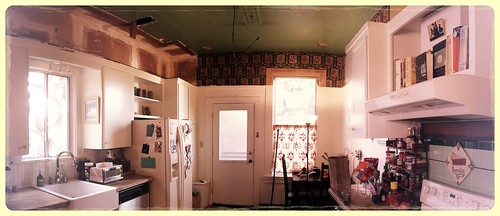
This is what the kitchen ceiling used to look like. This was the day we decided to buy the house.

ceiling-before

Since we don’t yet have the $ to replace our pipes, we opted to delay the bathroom remodel and instead we put our energies into demolishing the kitchen ceiling. Demolishing is (nearly) free! Yes, we’re tearing apart a perfectly good ceiling, but we have our reasons (Pro tip: It’s really ugly).

First thing we did was buy a reciprocating saw, a Ryobi that had a compatible battery pack with our drill. It didn’t work so well. It turns out that brute-force tools really need to be the plug-in variety. So we took it back and got a plug-in DeWalt (More expensive. Worth it.).

The ceiling is drywall attached to a very robust grid of beams. We started by sawing into the beams surrounding the useless attic access hole. Once the first section of beam was gone, we could start tearing away the drywall in chunks, moving across the room. randall with beams

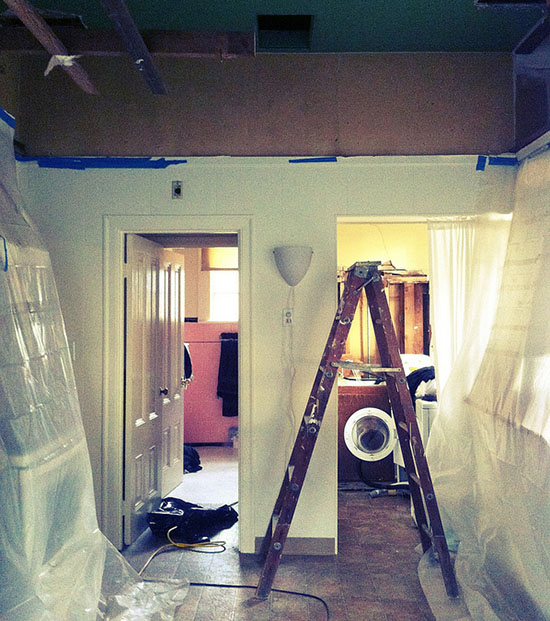
There’s Randall working around the inset fixture. Look at all those beams! Solid wood. It’s a big room and removing the drywall took all day. We left the room taped off and the next day we took out the beams with a combination of sawing wood and crowbarring the many long nails. After confirming the electricity was off, we let the light fixture fall to the ground. It took a little more than a day for the beams, but we ended up with this (click for larger):

Look at that paint line. The old wallpaper. That poor window! And in the rubble we found this:

65

Construction dude of 1965: While you may have created an architectural abomination, you were still a worthy craftsman and I salute you.

The ceiling.

Up next: The attic.

That Dang Light

Hi Y’all! Long time. Guess what? I finally finished the bedroom light!

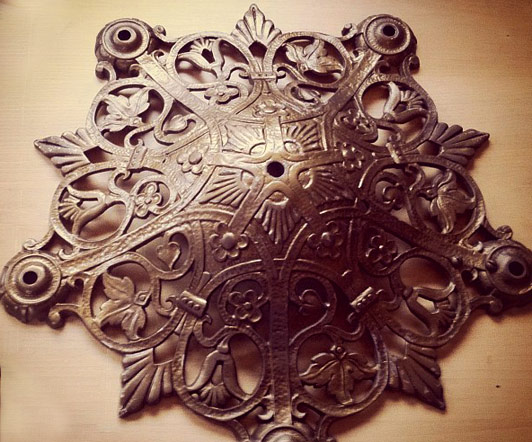
I had some setbacks, but it’s done, and I’m really happy with it. Remember back in March when I started all this? I spotted a type of light fixture on ebay I hadn’t seen before, but I wasn’t willing to spend what it sold for. So I hatched a plan and bought this chandelier to modify instead. As you can see it had hanging sockets, but not for long.

It arrived from the ebay seller as described: broken, discolored and as-is.
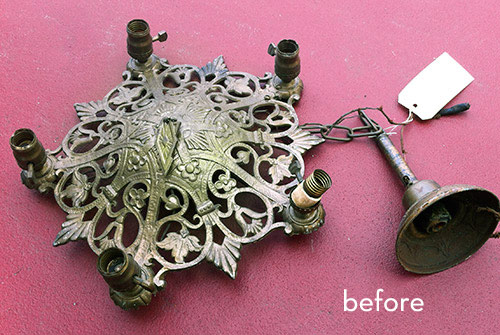

I began by taking everything apart that would come apart, and cutting away the old cloth-wrapped wiring. I got rid of the hanging sockets not intending to replace them.

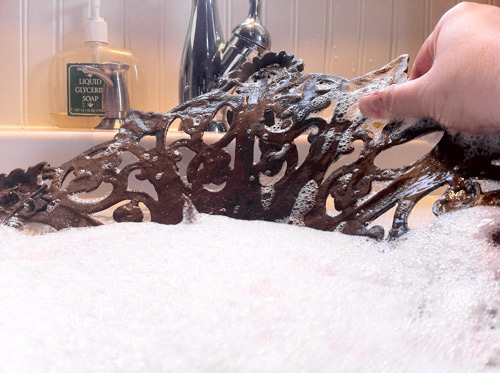
Then I gave it a bath! It was… gross. I knew it had been repainted at least once so it couldn’t be a whole century’s worth of dirt, but it seemed like it.
I readied my supplies: plain old acrylic paint (metallics). I don’t know that this paint will last a hundred years, but I think it’ll survive on something that doesn’t get handled often.

I mixed a color I liked, a nice rosy gold and painted all visible parts with a brush. I didn’t want it to look like a flat spraypaint job, so when the gold was dry I went over it with a watered-down wash of black paint, wiping it away with a rag anywhere it was too obvious. This toned down the gold and gave it some patina and dimension.

This is how it looked:
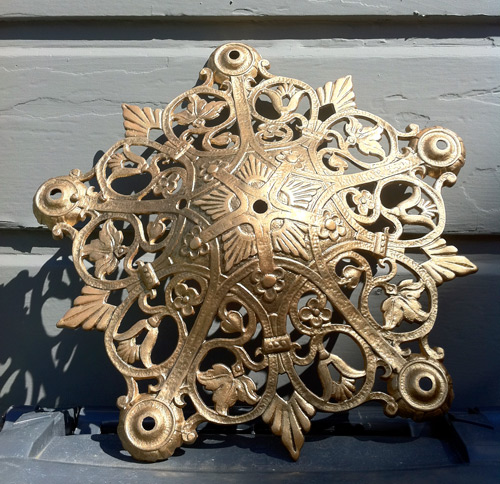
It was okay, but in the months since I started this project, I had bought some gold leaf enamel that had worked well on the house numbers, so I decided to accent with it. It helped make it look more like metal and less like paint.

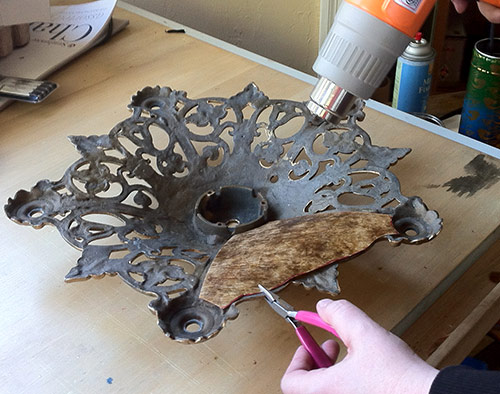
I also bought scraps of mica from another ebay seller who makes lampshades and proceeded to cut out the shade inserts. I bought silver mica, not the usual amber color. Turns out working with mica is pretty easy, at least for simple curves. It cuts with scissors and all you need to shape it is a heat gun, some tongs and patience.
To secure the mica panels in place I used a rubber compound called Sugru that Randall had given me. It sticks to what it’s molded to and cures in 24 hours. That’s what the black lumps are. It’s not the best looking adhesive but it was perfect for this.
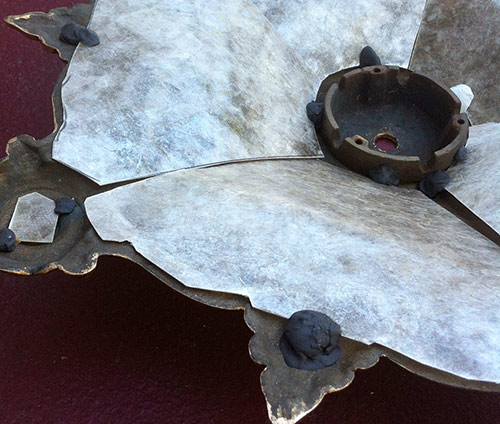
Here’s how it looked all painted with the mica in place. It certainly is gold. Now I just needed to wire in some sockets.
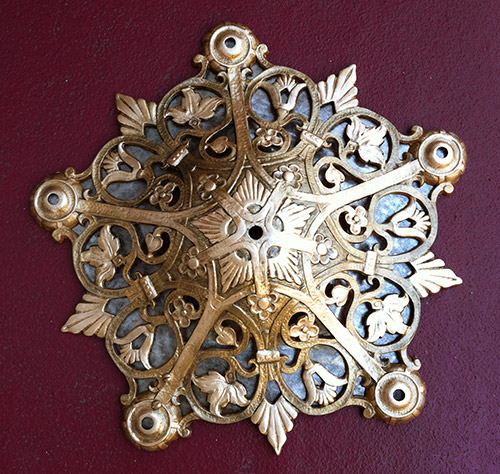
MEANWHILE, we moved our giant bed and went up the ladder to see how the current light was rigged up. Bad news – it was affixed not only by screws but with paint and plaster. We would literally need to chisel it out, and we wouldn’t know how to rig the new canopy until we saw what was in the ceiling, with the power turned off all the while. So we moved the bed back and delayed. For months. Until finally one day I realized that our local hardware store sells all kinds of obscure chandelier parts, and I got my confidence back. Randall got the old light down with a chisel and hammer, and we went right back to the store to get the couplings and bolts we needed to hang it. We bought the canopy there too. It’s not a great style match, but it’ll do.

Finally, after heroically wrestling with bolts and wires for most of the afternoon, Randall succeeded in getting it operational.

When I got the silver mica I was a little disappointed that it just looked like parchment when held up to the light, but with a bulb it looks lovely and crystalline. It’s a nice soft light for the room with a great silhouette design. I’m really happy with it and stare at it a lot.

Rehab: the chair

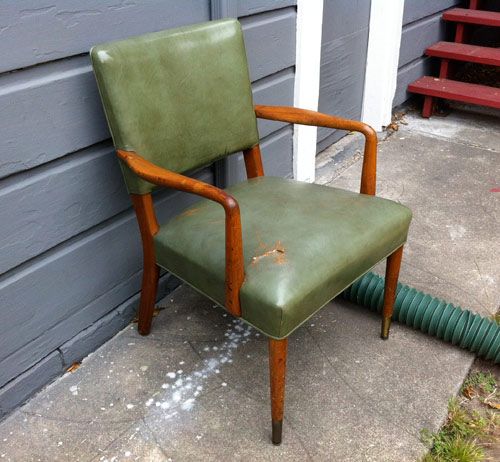
The neighbor across the street was moving and discarded this chair on the sidewalk. Solid wood utilitarian fabulousity from the earlier half of the 20th century. I thought it was vinyl at first, but it turned out to be leather beyond saving. It’s too bad, it was handsome.

This is not the first chair I’ve picked up off the street with intentions of reupholstering, but it’s the first one I’ve actually *done.* I went to Discount Fabrics for upholstery. Their stock constantly shifts and it’s pretty cheap, so I didn’t go in with any strong opinions and went with whatever caught my eye. I was thinking maybe something in a mod pattern or bright tweed, but the winner this visit happened to be magenta velvet. It was the best choice! How can you go wrong with magenta velvet? That’s right, you can’t! I also got some 8oz. batting to pad it out.
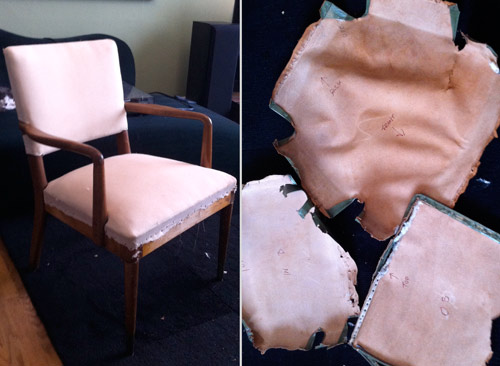
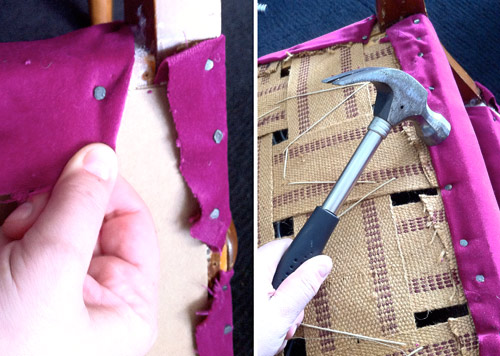
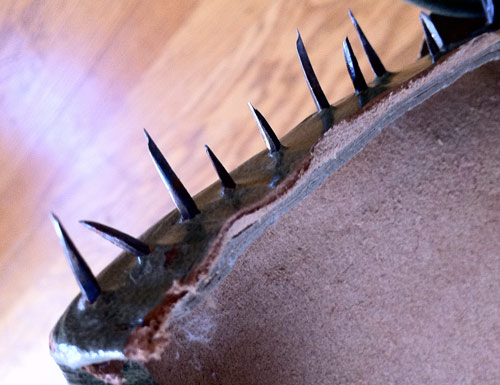
I began by prying off the leather with a flat-head screwdriver. It was very stabby. Lots of this action:

I have newfound respect for upholsterers. Many finger-stabs and skinned knuckles later, I had this and this:

I threw away the old batting and labeled all the pieces (Label first! You’ll forget later.) and noted their orientation in sharpie. Everything you need to know about reupholstering you can learn from taking the chair apart. Take photos if you need to. Make notes about the order in which you took parts off. I had bought upholstery tacks but there were so many on the previous job that I reused a lot of them.

The chair looked pretty good in just muslin, but it was half-naked. It’s a nice chair. It has tied springs and strapping under what you see above, and it’s still in good shape. I started out using the pattern pieces to cut new ones, but allowing enough edge to work with they were basically just large square shapes. So I just cut big pieces and fit them to the chair as I went. I did the same with the batting first, tacking it down at critical points and trimming away the excess. You want the batting to be able to move a little as you adjust and smooth the upholstery over it, so don’t go crazy on attaching it.

I squared the grain of the fabric with the frame of the chair, and started nailing the underside, six or eight evenly-spaced nails per edge. I did one whole edge of the seat first, starting in the center and smoothing between each nail to keep the fabric from puckering. Oh, and if you care about keeping the wood pristine, use a rubber mallet, not a regular hammer like I did.

Once one side is nailed in, turn the chair over and smooth the fabric in the direction of the opposite edge and do the same on that side. It involves a lot of tugging and nailing at the same time because you want the fabric to be taut, not baggy. Three hands would be useful at this point. I was folding the raw fabric edges under for neatness, but I think I’m going to just cover the underside with that black fabric the pros use and not worry about it. Fold the fabric into hospital corners at the corners of the cushion just like you would when making a bed, and nail those down too.

It’s pretty much done and Mooncookie is into it. It will look more finished if I ever get around to doing the edge piping. Maybe later. Magenta velvet chair!

Sink 911

20120520-205723.jpg

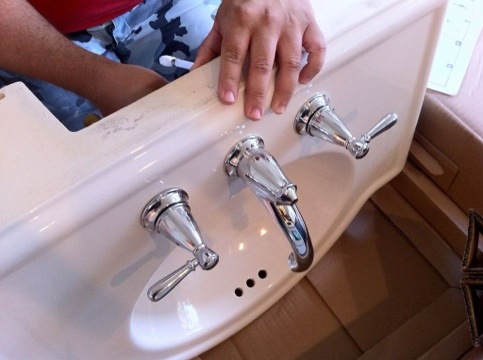
It’s been pretty stressful around here for the last couple of months so Randall and I booked a vacation, the kind where you lay around by a pool and a nice man brings you drinks and you can read your book all day long. The day before we were to depart our bathtub and sink began to drain very slowly. Randall went to the P-trap to attempt to snake it and the pipe promptly broke off in his hand. Oh 60 year-old plumbing! You little scamp. The old drain broke off where it threads into the sink and there was no way to replace it, so the whole sink had to go. Twist my arm! I hate that sink. But first we had to go on vacation. Continue reading “Sink 911”

Custom house numbers

20120415-204244.jpg

Since before we painted the outside of the house I’ve been looking for some nice house numbers. There’s lots of great options if you’re looking for mid-century modern or arts and crafts, but Victorian? Not so much. I realize that address numbers were probably not fancy if you lived in a cottage in 1900, but this place needs some gussying up. And I believe the functional necessities in life can and should be beautiful. Not boring.

I was considering painting an address plaque but my brush skills are hit or miss. And then I remembered Ponoko. It’s a website where you can upload 2-D or 3-D designs and have them cut out of a variety of materials (wood, felt, metal, plastic, etc). I’ve been looking for an excuse to try out their service for a while and coming up with a design on the computer is more my speed. Continue reading “Custom house numbers”

Restoring and revamping old lights

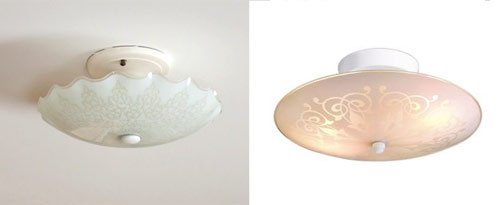
We need a new light in the bedroom. I hate the light in there. The table lamps are fine but I try to never use the overhead light, I dislike it that much. It’s nothing special, just the same style of bedroom light most of us grew up with. I couldn’t get a decent picture of it, but it’s this style:

only not as nice as either of these.

I’m particular about light. I don’t like direct light unless I’m working, and I don’t like light that’s the wrong color. I’m never going to adopt CFLs, I’m sorry to say. I like warm and clean light that bounces off walls and ceilings before it gets to me. I think bad lighting can ruin an otherwise nice room. Anyway, I’m particular. And especially particular about bedroom light.

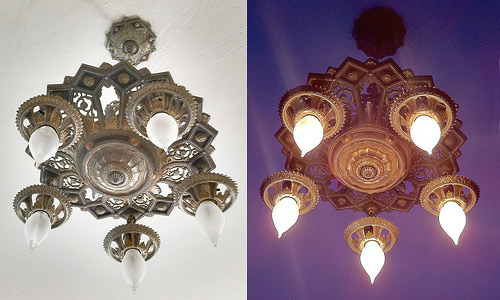
Some background: Randall rewired and I restored an antique chandelier last year. It wasn’t hard to do, and after it was done and hung, I realized I could have done more with it than I did. It’s hard to see subtle detail from that far away. (click here if you want to see the before-restoration version)

The other thing I realized is that although this 20s-30s style of chandelier is pretty, and plentiful on ebay, it’s a major direct-light offender. Which is fine in the office with some old-style bulbs that are interesting to look at, but not what I want for tranquil bedroom light. Continue reading “Restoring and revamping old lights”